
Introduction
Joining Windows 11 to Microsoft Entra ID (formerly Azure AD) enables modern identity features such as SSO, Conditional Access, Intune enrollment, and easier device management.
This guide covers prerequisites, the join process, verification, and basic troubleshooting.
Prerequisites
Before starting, confirm:
- You have a valid Entra user account.
- The account is allowed to join devices to Entra ID.
- Device join limits are not exceeded for the user.
- The PC has internet access and can reach Microsoft sign-in services.
- Date/time on the device is correct (important for auth tokens).
Optional but recommended:
- Intune auto-enrollment configured in Entra/Intune.
- MFA ready for the user account.
Step 1: Open Access Work or School
- Open Settings.
- Go to Accounts.
- Select Access work or school.
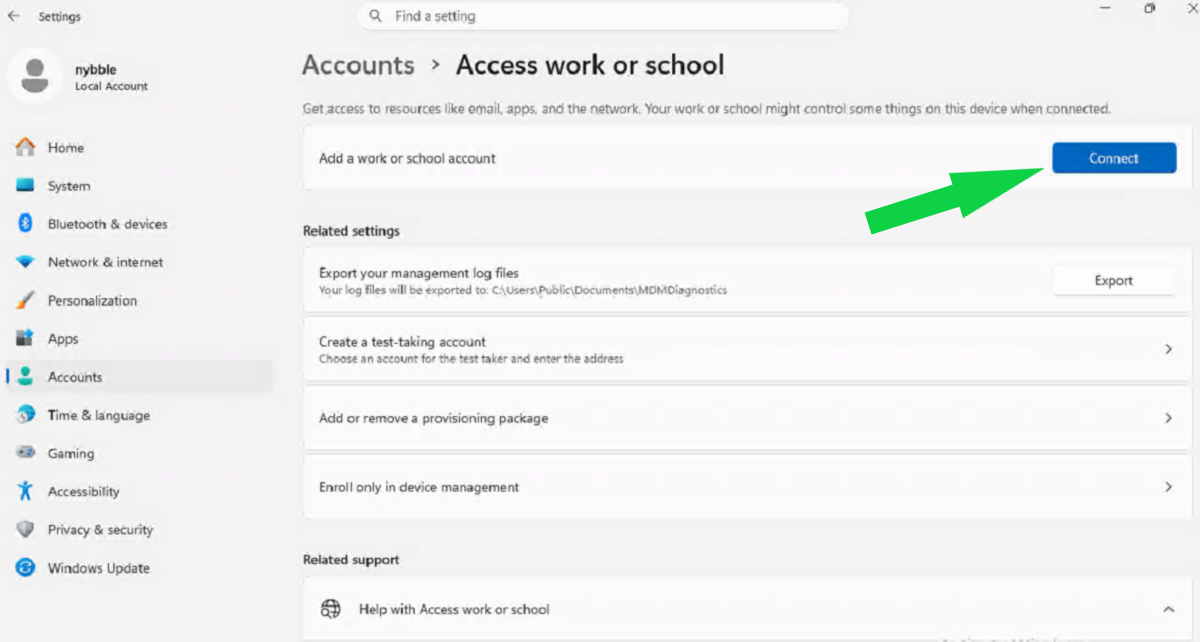
Step 2: Start the Entra join flow
- Click Connect.
- In the dialog, select Join this device to Microsoft Entra ID.
- Enter the Entra user email (for example,
user@contoso.com). - Complete password and MFA prompts.

Step 3: Confirm the join
After successful sign-in:
- You should see a confirmation that the device is joined.
- The connected account appears under Access work or school.
Restart the device if prompted.
Step 4: Sign in with Entra account
At the Windows sign-in screen:
- Choose Other user (if needed).
- Sign in with the Entra user (
user@domain.com).
If first login takes a little longer, that is normal while profile setup completes.
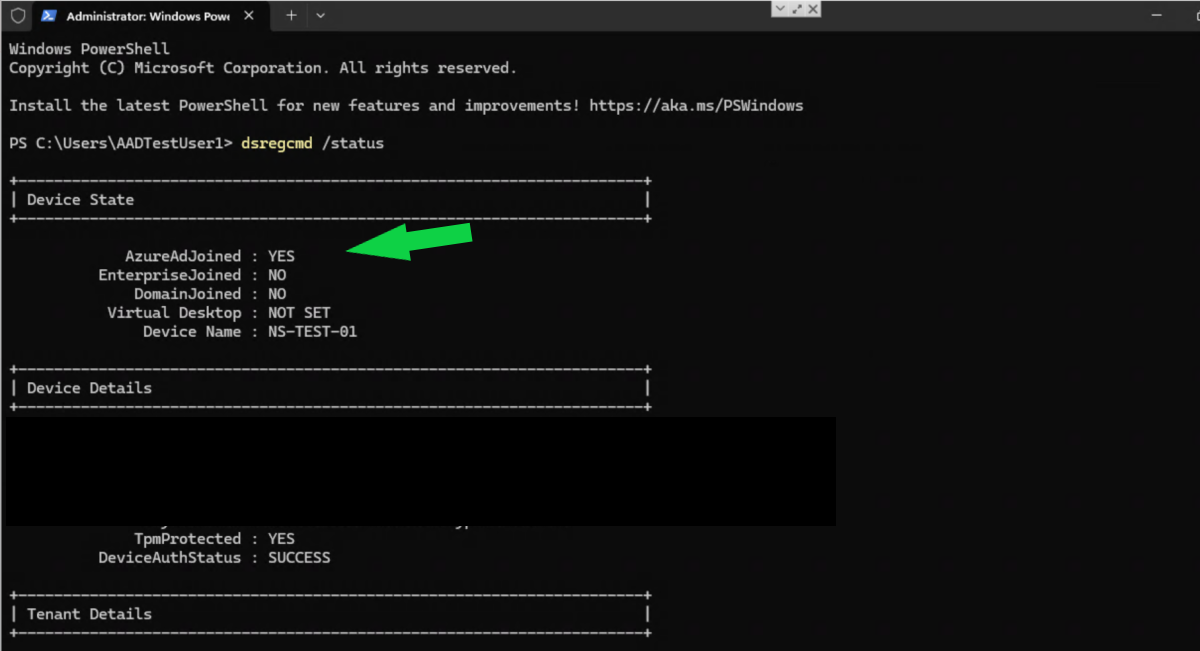
Step 5: Verify join status from command line
Open Command Prompt or PowerShell and run:
dsregcmd /statusLook for:
AzureAdJoined : YESDomainJoined : NO(for cloud-only joined devices)- Valid user/device state sections
Optional: Verify MDM enrollment
If you use Intune auto-enrollment, check:
- Settings -> Accounts -> Access work or school -> connected account -> Info
- Device appears in Intune admin center
Related hardening step:
Common issues and fixes
1) “You cannot join this device”
- User may not have permission to join devices.
- Check Entra settings: device join restrictions and max devices per user.
2) MFA or sign-in loops
- Confirm Conditional Access and MFA policies allow device join flow.
- Test sign-in on
portal.office.comfirst to isolate account issues.
3) AzureAdJoined : NO after setup
- Ensure internet access and correct system time.
- Run
dsregcmd /statusagain after reboot. - Disconnect and repeat join process if needed.
4) Intune not enrolling
- Check MDM user scope in Entra.
- Confirm user is licensed for Intune/EMS.
- Review Enrollment failures in Intune logs.
Quick rollback (if needed)
To remove the Entra join from the device:
- Go to Settings -> Accounts -> Access work or school.
- Select the connected Entra account.
- Click Disconnect.
Then restart the PC.
Conclusion
For most organizations, Entra joining Windows 11 devices is straightforward: connect account, complete MFA, verify with dsregcmd /status, and confirm management policies apply.
For production rollouts, pilot with a few users first and validate Conditional Access plus Intune behavior before broad deployment.